- Noise reduction - pretty utilitarian & usual goal. When you have photos pictured with high ISO or within poor lighting conditions noise reduction will give them a more natural look
- Sharpen edges
- Great artistic effects - my favorite part, images processed with bilateral filter get an appealing glossy look
The next post presents a .NET implementation of the filter.
The genuine article on the filter can be found here.
How it works
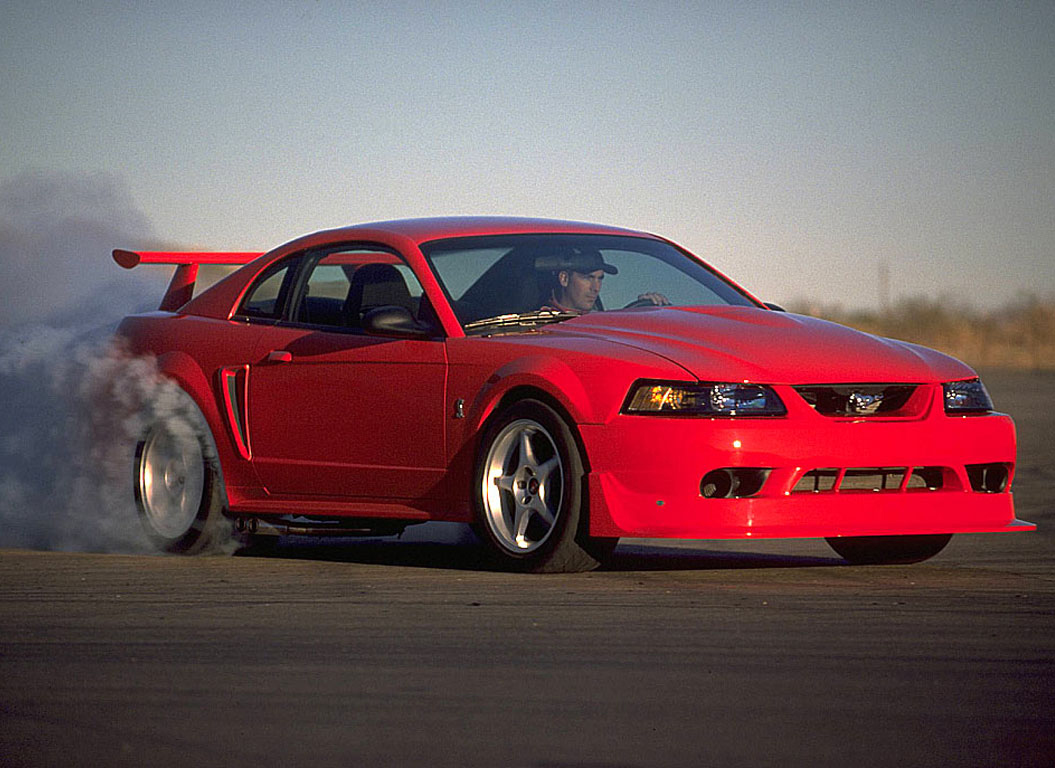
Let's start with a sample. Bellow you may see three images (taken from the original article):
- The first (from left to right) is the original photo of a red jacket against blue sky, lots of noise.
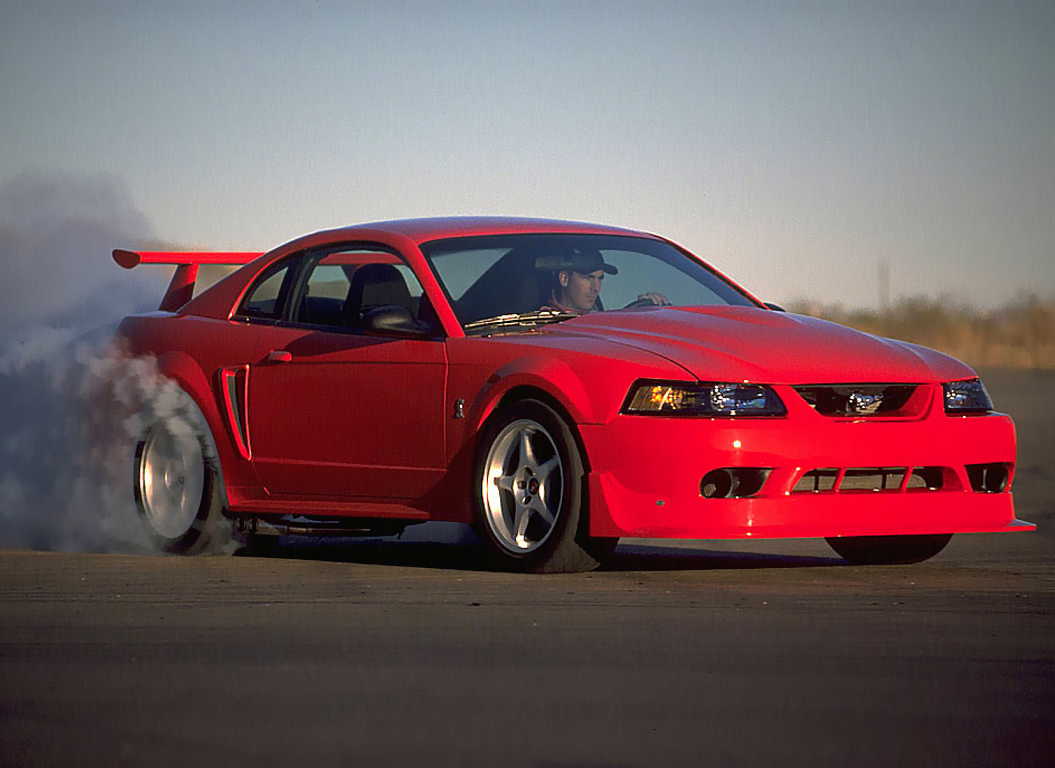
- The second image was received after Gaussian blur (that filter can be found in Photoshop and I assume in almost any other photo editor), the edge is blurred while no noise at all.
- The last image is processed by bilateral filter, the edge is sharper, noise is removed.
 The above sample is a good demo of the Bilateral filter concept: it blurs only similar areas (domains) while bypassing contrast transitions (edges).
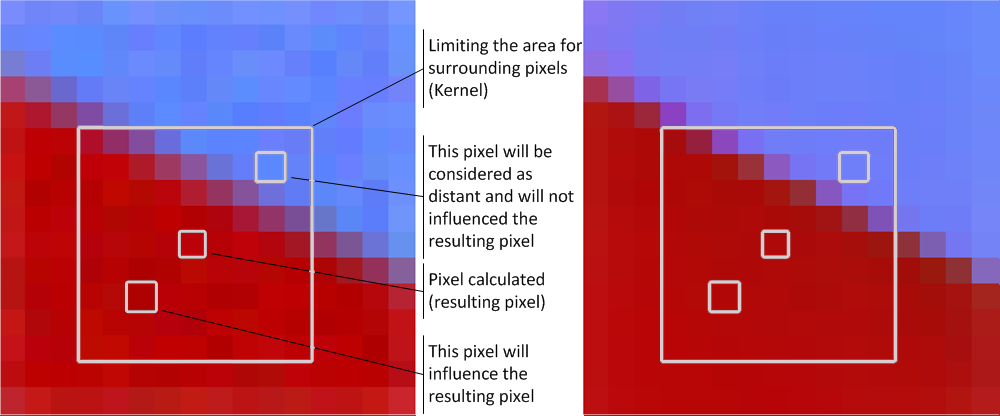
To be more precise Bilateral filter does a pixel-by-pixel evaluation and calculates the color for a specific pixel depending on the colors of surrounding pixels. The influence on the result is determined by the similarity of the surrounding pixels to the processed pixels. There're 2 criteria which define the similarity and "weigh coefficient" for a specific pixel (how much it puts into the result):
- Spatial closeness, i.e. distance between 2 pixels, the further specific pixel stands from the resulting the less it influences it
- Color closeness - color difference, black and white are "color distant", so as red and blue (in RGB model) . Due to considering this criterion we get edge preserving, red pixels do not influence blue ones and the edge between areas stays sharp
Assume we do the pixel-by-pixel processing in Gray scale image (one pixel = one byte). For each pixel being calculated we operate with numeric values in range [0;255]. The value for the resulting pixel is calculated as a weighted mean of surrounding pixels were weight is determined by pixel color and spatial functions.
The formula for calculating pixel value is as follows:
where Px,y - pixel value being calculated, Pi,k - one of the pixels in the surrounding area (kernel), n - surrounding area size (kernel size), Fcolor - function that determines color closeness, Fdistance - determines spatial closeness.
Fcolor, Fdistance are the functions which define the results produced by the filter. They are exponent functions and details on the internals can be found in the article describing bilateral filter. Since it's an iterative algorithm a limited number of pixels takes part in calculation which is determined by the surrounding square (kernel).
The important thing is that there're 3 parameters which influence the functions & algorithm and thus the results. The parameters are positive integral numbers:
- Color Factor - the greater the number is, the greater are the domains and less contrast edges will get blurred.
- Spatial Factor - the greater the value is the more blurry effect you'll get in domains, i.e. in areas of the same color.
- Kernel Size (n) - this is an odd number > 1 (3, 5, 7, ...). It limits the set of pixels which take part in computation. This parameter influences performance (large values > 21 can slow the process dramatically) and the general "power" of the filter (low values < 5 on high resolution images may not produce any noticeable results).
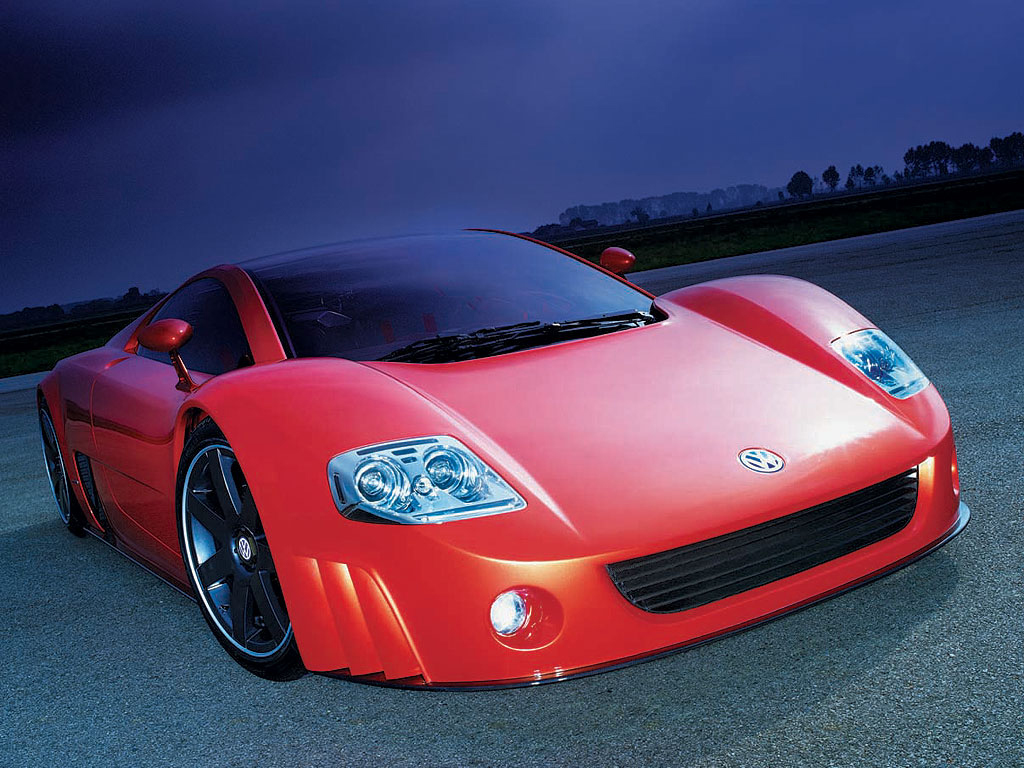
Bellow you may see another example of bilateral filter being applied to RGB image. The approach is exactly the same as described above but in this case each channel values for a specific value is calculated separately (instead of one value for gray scale image 3 values are calculated for a pixel):
Filter parameters influencing the output
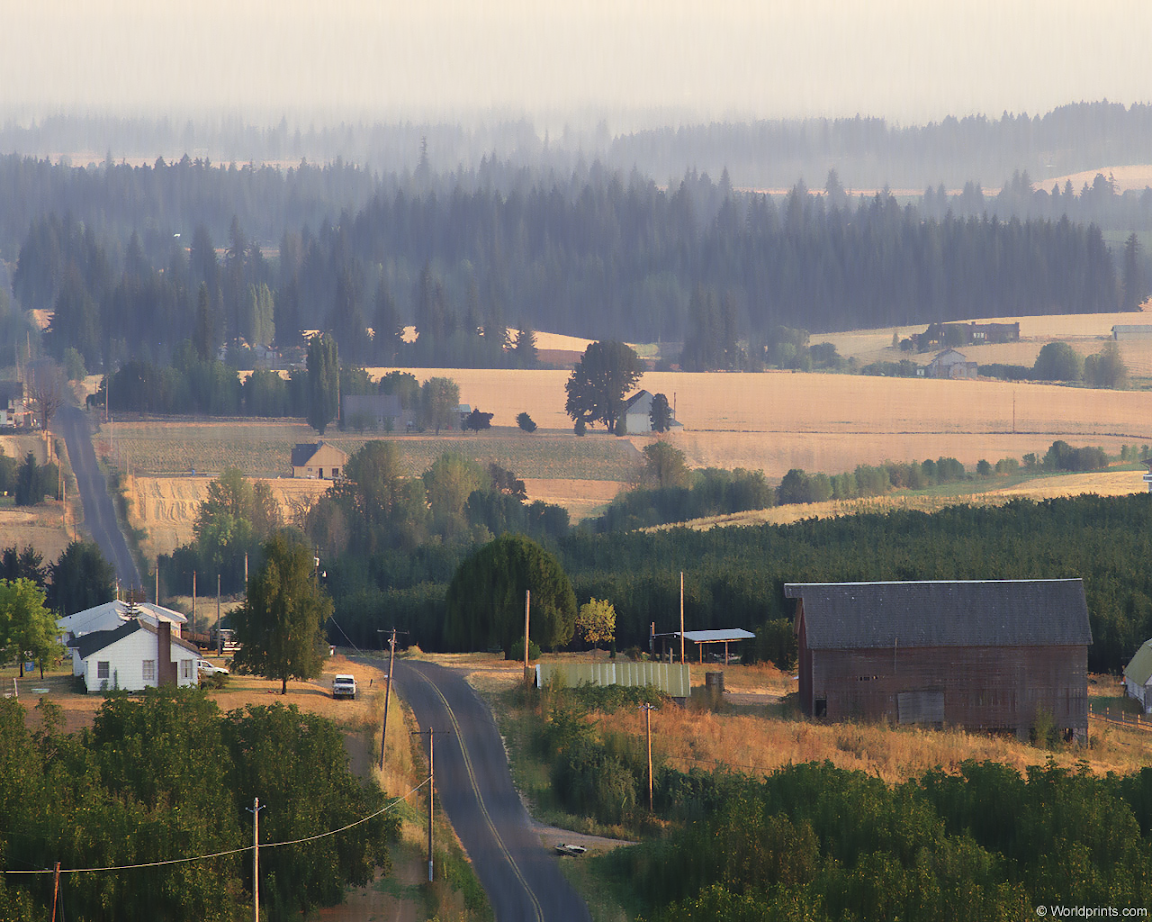
Bellow you'll find an original image and a grid depicting how the image is changed by the filter depending on specific parameter values, kernel size is 7 and is constant:
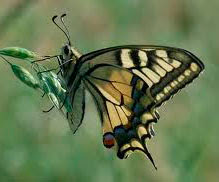
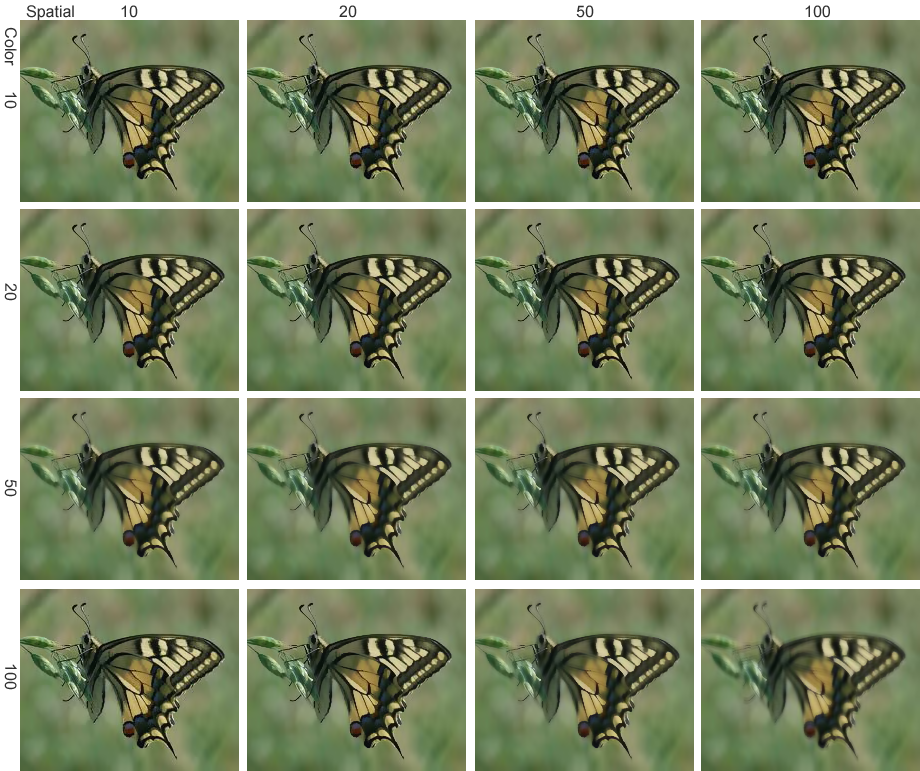
Image samples
Original
Kernel = 13, Color = 20, Spatial = 50

Original
Kernel = 15, Color = 7, Spatial = 70 (noise reduction)
Kernel = 19, Color = 20, Spatial = 100 (adding blurry effect)

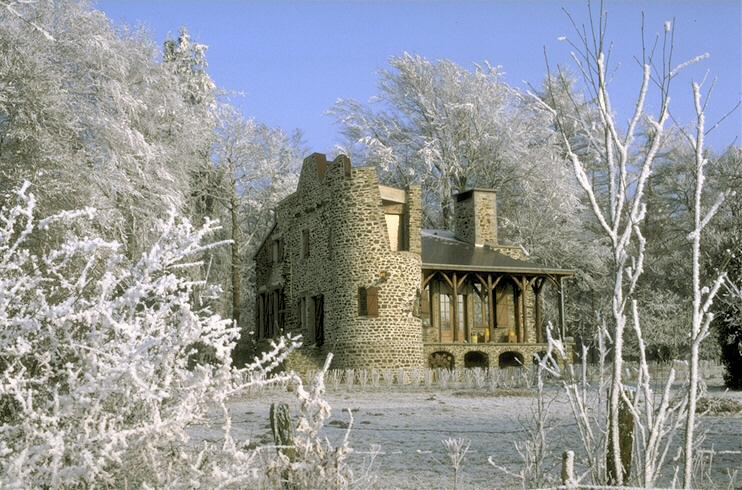
Original

Kernel = 21, Color = 7, Spatial = 100 (noise reduction)

Kernel = 21, Color = 21, Spatial = 100 (adding blurry effect)

Original

Kernel = 25, Color = 10, Spatial = 70 (noise reduction)

Kernel = 25, Color = 20, Spatial = 70 (adding blurry effect)
Original
Kernel = 25, Color = 20, Spatial = 70 (adding blurry effect)

Congested zones, commercial spend, commercial plants; it is a proven fact that in our places contamination is ruling superior in all possible types. Though this problem has particularly been on the world power's plan since long, and despite continuous exhortations to all the people to help in this, all battle seems to have created minimal outcomes. We have not observed much about the environmental disturbance, but absolutely it is a kind of problem of our own community.
ReplyDeleterentalprotectionagency.
I would like to thank you for the efforts you have made in writing this article. I am hoping the same best work from you in the future as well. blurry imag
ReplyDeletethanks for sharing such a nice working.
ReplyDeleteremove object
Blur Photo Editor & Blur image Background Effect on picture has many blurry image tools for blur image editing. Easy to make your photo background DSLR blur effect.
ReplyDelete